Website speed is termed as the speed with which your site or its pages get opened. It can be described as “page load time” (the time it takes to fully display the content) or “time to first byte” (how long it takes for your browser to receive the first by of information from the web server).
It doesn’t matter usually how we define page speed, the only important thing to consider here is how we can get pages work better and faster.
The Current IT world is getting faster and faster with each passing day and now it’s all about speed and performance. Users on the internet don’t have enough time to sit back and wait for some website to get load.
According to a Caltech Survey, more than 90% users close a website if it doesn’t load properly in under 7 seconds. Thus, speed optimization of your website is very crucial if you want to keep your website fastest in the market!
There are so many factors upon which site page speed depends. For a perfect site working lightning fast, you should consider all factors.
Negligence on even any one factor’s part will result in slow speed of your site. In this article, we have researches and tried to collect all factors according to Google PageSpeed Rules. We’ll discuss the problems, solutions and tips regarding making your website work faster.
You may also like;
Let’s have a look on all factors and discuss them in detail:
Get Your CSS Perform Better

CSS is very important when we discuss page speed and ways to improve it. This is how you can make your CSS better:
1) Eliminate Render Blocking CSS
Render means to display and “render blocking” means something which is delaying the page from being displayed. Render blocking CSS is responsible for page delay most of the times.
In fact, every one of your CSS files result in page delay. Also, as your CSS gets bigger or the number of CSS files increases, the longer it takes the page to get load. Render blocking CSS results in slow speed of your website, less visitors and less AdSense earning.
-
-
-
Properly call CSS
While calling CSS from your files you should take care of certain things. For example you should not use @import to call your CSS files. Instead you should add your external CSS in main file or you may use <link> tag to call your CSS.
-
Use less CSS files overall
Another way to eliminate render blocking CSS is that you should use less CSS overall. There are two ways to deal with this thing. First, you can combine your CSS files to make one big file and second you can use inline CSS files in HTML. This will reduce size of your main CSS file as well.
-
-
These tips for removing render blocking CSS are only useful when you have written your own CSS. If you have purchased some theme or using some template, you should confirm first that theme/template is not using any render blocking CSS.
2) Optimize Your CSS
While using CSS, you should make sure that your CSS is optimized. Optimized CSS of a website should have following properties:
- Total size of all CSS files should be less than 75KB.
- There should be no @import CSS calls.
- Inline CSS should be used in <style> tags.
- CSS should not be used inside HTML <div> tags.
- All CSS files should be combined to make one big file.
3) Minify CSS
In addition to following all above instructions, you should also minify your CSS. Minify CSS means making file size of CSS smaller so it will load faster. For minifying it, you should write as much CSS code in one line as possible. For example:
Here is an example of non-minified CSS:
body
{
 background-color:#d0e4fe;
}
h1
{
 color:orange;
 text-align-center;
}
And here is same CCS, minified:
body {background-color:#d0e4fe;} h1{color:orange;text-align-center;}
You can minify your CSS via some automatic tool or manually.
4) Always Call CSS First
In your HTML page, you should always call CSS before JavaScript, images or any other thing. This will load your pages faster. This happens because browsers always download and parse complete CSS file before loading the view.
If your images or JavaScript files will come before, browser will first download them and then come to your CSS file which will result in a delay which may go up to 2 seconds in worst cases.
Here are simple and straight forward rules to remember about delay times in this case:
- CSS will be called in the first place, then the browser will get it in a maximum of one second.
- If we call CSS in the second place before JavaScript, the page load time will become two seconds, because browser will take one second to retrieve JavaScript and one second to retrieve CSS.
- The browser will get it in three seconds and in case of heavier and more images, it may take even more time if the CSS file will be called after images and JavaScript.
This point is very important to remember as in very worst cases, this delay may go up to seven seconds which will decrease your traffic drastically.
5) Call CSS From One Domain Only
In the modern world, as the browsers and CSS is getting better, the trend of using online CSS resources is getting handy. Although it is very easy but it reduces your page load as well because when your browser loads the page, it gets CSS from different domains.
This increases response time and files coming from different domains and sub domains take time. You should try to call all CSS files from one domain only. You may download online CSS resources. This will reduce page load time of your website and it will open lightning fast.
By just following these easy advices regarding CSS, you can get your page speed increased even up to 300%. If you are a developer yourself, you can easily follow them.
However, if you are using a theme/template, although you may change most of things but still you should speak to the designer in order to get all these CSS things implemented properly.
Fix Your JavaScript
JavaScript factor is very important for page speed as JavaScript/JQuery files are usually the largest files in any website. There are many things which can be done on JavaScript end to make rendering of your page faster. Let’s have a look on all of them.
1) Eliminate Render Blocking JavaScript

Render means loading, so if something is render-blocking, it means that it is keeping the page from loading as quickly as it could.
Google officials recommend to remove such JavaScript that interfere with loading the above the fold content of your webpages. “Above the fold” means what a user sees initially on the screen before they scroll or go down.
Eliminating render blocking JavaScript is very important because most of the times, developers use a JavaScript library JQuery. And JQuery files can be as big in size from original HTML file as ten times. That means making a decision to load JavaScript on the right time is very important.
Otherwise, your site will get slow and it will let your users wait. It should be noted that it will also create problems with SEO as Google don’t give those links in search results which let users wait for a longer time.
In order to resolve this thing, you should always load your JavaScript after the whole page is being load. So, your JavaScript file links or script should be placed just before the end tag of the body.
It will download and parsed after whole page is being loaded and thus it will result in more speed of your page.
2) Combine External JavaScript to Make One File
JavaScript is usually written in several external files and this results in page delays because for calling and reading all files, the browser made separate requests for each file which results in a delay.
The problem can be resolved easily by combining all JavaScript into one file only. This can be done easily by simply copy pasting JavaScript from all files into one file and then calling that file. Since JavaScript is written in a specific way, it will still work perfectly fine.
After doing that, you should check your webpage speed and it will load faster. Combining JavaScript has very significant impact on page speed as we have observed in recent tests.
3) Use Inline JavaScript
When you place your JavaScript inside HTML file using <script> tags, it is called inline JavaScript. Inline JavaScript should be used when your JavaScript code is small and you don’t need to place it in a separate JavaScript file.
There are many benefits of using Inline JavaScript. It saves you from the hassle of handling extra files and results in excellent page speed as browser don’t need to make extra calls for fetching JavaScript files in this case.
4) Defer Loading JavaScript

Following all above tips can help you make your pages load faster but you can even make it better by following this technique. Basically in this technique, we separate our JavaScript code into two files.
The first file contains the code required to display the page properly. Second file contains the code which is required after the page is displayed for example code to run on some click on the page etc.
Now we’ll call first file as usual so browser will call it while displaying page. The second file will be called after the page is displayed properly.
So, the question arises that how to call second file after page load. Placing the call at the end of the page is not enough. You should follow following method in order to do this properly.
#1 Copy below code
<script type="text/javascript">

function downloadJSAtOnload() {

var element = document.createElement("script");

element.src = "defer.js";

document.body.appendChild(element);

}

if (window.addEventListener)

window.addEventListener("load", downloadJSAtOnload, false);

else if (window.attachEvent)

window.attachEvent("onload", downloadJSAtOnload);

else window.onload = downloadJSAtOnload;

</script>
#2 Paste code in your HTML just before the </body> tag (near the bottom of your HTML file).
#3 Change the “defer.js” to the name of your external JS file.
#4 Ensure the path to your file is correct. Example: if you just put “defer.js”, then the file “defer.js” must be in the same folder as your HTML file.
In this way, you can properly implement this change. Doing this will result in very good results and your page speed will increase by many times.
As we saw, JavaScript can be a major factor behind the page speed, you should not only implement all above things but also you should use as less JavaScript as possible.
Long and irrelevant scripts with redundant code lines should be avoided at all. If your code is small, always use it inline and avoid using external JavaScript files.
Improve Server Response Time
It is important that you do all efforts mentioned above, but there is no benefit of them if your server response time is bad. Server response time is the amount of time it takes for a web server to respond to a request from a browser.
According to the Google, the server response time should be less than 200ms.
Server response time depends on several factors like website traffic, website resource usage, web hosting and web server software.
All these factors can affect server response time. For example, as traffic on the website will increase, the response time of the server may get bad as the server has to load resources for everyone. This problem can be dealt by following these useful techniques.

1) Deal with CSS/JavaScript
You should follow all above directions for making your CSS, JavaScript better.
2) Use Fewer Resources Per Page
Try to use less CSS, JavaScript and image resources on each page. The lesser, the better. It will help your server serve pages faster and to more people at a time.
3) Get a Perfect Web Hosting
Get a perfect web hosting from a right service provider. This thing is most important as if your web hosting is not up to the mark, you’ll run into the trouble. Web hosting choice depends on the type of application you are using. Let’s have a look at recommended options for all types of applications.
If you are on WordPress, you should get WordPress specific hosting so you’ll not run into any problem later. Recommended hosts for WordPress are WPEngine and GoDaddy.
If you are going with shared hosting, that can be a better and economical, but you should always get it from a trusted host. BlueHost is recommended for shared hosting.
For VPS Hosting/Dedicated servers, you may go for KnownHost or WiredTree.
4) Web Server Software and Configuration
Make sure that your webserver software and all configurations are up to date. Always select right web server software. Here are few choices:
Apache: Apache is an open source and free software maintained by Apache Foundation. It is most used web server with detailed documentation and resources.
Apache has pretty good tutorials available on the internet as well. Although, The default install of Apache is not the best performer, but it has so many users and modules and add-ons that it can be made to do just about anything.
NginX: The NginX is a free web server and it is best for websites which receive high traffic. This server performs amazingly even at its default install. It uses very few resources and handles more traffic than other available web servers.
It has very small response time, and PHP runs very fast with NginX.
Litespeed: This web server is available in free and premium versions. It is faster as compared to Apache with the added benefit of completely compatible with Apache.
It uses same .htaccess file as Apache so that means moving to LiteSpeed from Apache is very easy and painless. PHP runs six times faster with Litespeed.
In a nutshell, all these factors can really create a difference in regarding page speed. Also, all factors related to the server are very important and you shouldn’t ignore them. If you have money, you should definitely invest it in hosting and servers to get things faster.
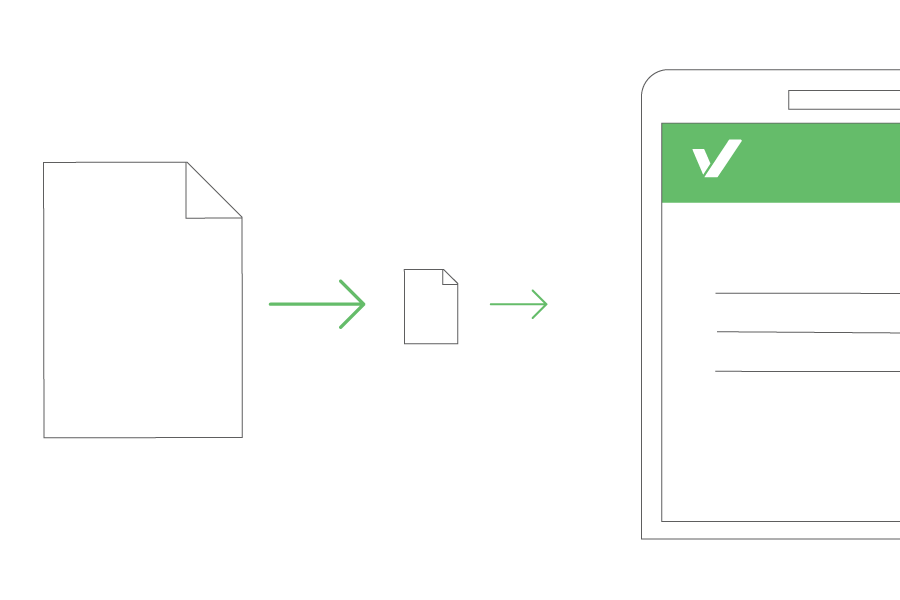
Use G-Zip compressed Server Files
G-Zip is a file format and a method of compressing files for faster network transfers. After G-Zip compression, your server has to serve smaller files which results in better response time.
G-Zip compression can be enabled easily in web server configuration. Different webservers have different instructions which I will explain below. Here is how you can enable G-Zip compression for .htaccess, Apache, NginX, and Litespeed Servers.
1) G-Zip Compression via .htaccess
For most of the people, compression can be easily enabled via .htaccess file. The .htaccess is a file which does many important things for your site.
All you need to do is to add this code to your .htaccess file. After adding code, save the file, restart server and feel the difference!
<ifModule mod_gzip.c>
 mod_gzip_on Yes
 mod_gzip_dechunk Yes
 mod_gzip_item_include file .(html?|txt|css|js|php|pl)$
 mod_gzip_item_include handler ^cgi-script$
 mod_gzip_item_include mime ^text/.*
 mod_gzip_item_include mime ^application/x-javascript.*
 mod_gzip_item_exclude mime ^image/.*
 mod_gzip_item_exclude rspheader ^Content-Encoding:.*gzip.*
 </ifModule>
2) G-Zip Compression for Apache Servers
Above instructions of adding code to .htaccess file will work properly. If it doesn’t seem to work, you should remove that code and add this one instead:
AddOutputFilterByType DEFLATE text/plain
 AddOutputFilterByType DEFLATE text/html
 AddOutputFilterByType DEFLATE text/xml
 AddOutputFilterByType DEFLATE text/css
 AddOutputFilterByType DEFLATE application/xml
 AddOutputFilterByType DEFLATE application/xhtml+xml
 AddOutputFilterByType DEFLATE application/rss+xml
 AddOutputFilterByType DEFLATE application/javascript
 AddOutputFilterByType DEFLATE application/x-javascript
3) G-Zip Compression on NginX Servers
For enabling G-Zip compression on NginX servers, add the following code in your config file:
gzip on;
 gzip_comp_level 2;
 gzip_http_version 1.0;
 gzip_proxied any;
 gzip_min_length 1100;
 gzip_buffers 16 8k;
 gzip_types text/plain text/html text/css application/x-javascript text/xml application/xml application/xml+rss text/javascript;

 # Disable for IE < 6 because there are some known problems
 gzip_disable "MSIE [1-6].(?!.*SV1)";

 # Add a vary header for downstream proxies to avoid sending cached gzipped files to IE6
 gzip_vary on;
4) G-Zip compression on LiteSpeed Servers
Enabling G-Zip compression on LiteSpeed is very easy. All you need to do is to go to the configuration under “tuning”. Just go down to “enable compression” and check if it is On. If it is Off, then click “edit” and turn it On. That’s it.
HTML, CSS, and JavaScript files may become fifty to seventy percent smaller after compression. That means it can result in a significant change in website speed.
All developers and system administrators should definitely implement this in their systems.
Leverage Browser Caching

Browser cache is a space where browsers stores thing temporarily for later use. Leveraging browser caching is a process in which webmasters instruct browsers to cache web pages so when a user will open a site second time, the browser will show her webpage from the cache and will not have to go to the server.
This is why first time loading of the site takes more time as compared to the later. Browser caching can result in huge differences.
So know you must be wondering how to leverage browser caching. For doing this, you need to change the request headers of your resource files to use caching. Doing this is a very easy and simple process.
All you need to do is to add some code to a file called .htaccess on your web host/server.
The code below tells browsers what to cache and how long to “remember” it. It should be added to the top of your .htaccess file.
## EXPIRES CACHING ##
 <IfModule mod_expires.c>
 ExpiresActive On
 ExpiresByType image/jpg "access 1 year"
 ExpiresByType image/jpeg "access 1 year"
 ExpiresByType image/gif "access 1 year"
 ExpiresByType image/png "access 1 year"
 ExpiresByType text/css "access 1 month"
 ExpiresByType text/html "access 1 month"
 ExpiresByType application/pdf "access 1 month"
 ExpiresByType text/x-javascript "access 1 month"
 ExpiresByType application/x-shockwave-flash "access 1 month"
 ExpiresByType image/x-icon "access 1 year"
 ExpiresDefault "access 1 month"
 </IfModule>
 ## EXPIRES CACHING ##
After the time specified in the code, the browser will automatically remove these resources from the browser cache. The above values are pretty optimized for most of the blogs and webpages but if you want to change them, you can do so. For example, if you want to store jpg images for one month only, you should replace “access 1-year” with “access 1 month”.
Another method of caching is known as Cache-control, which is more effective and easy for most of the people as compared to the above method. It also gives you more control over caching. Example use of cache control in .htaccess file maybe:
# 1 Month for most static assets
 <filesMatch ".(css|jpg|jpeg|png|gif|js|ico)$">
 Header set Cache-Control "max-age=2592000, public"
 </filesMatch>
This code is setting headers for the caching. Let’s understand this code line by line.
The first line is just a comment for our ease and doing nothing.
The second line is specifying types of files for which we are going to enable caching. You can also add and delete file types in this line. For example, if you want to cache HTML files as well, just add HTML in the second line.
The thrid line is doing the main job. It is setting headers for cache control and specifying that the caching will be public, and its age will be 2592000 seconds.
You can also change this duration. Also, you can write this code twice as well and set different caching intervals for a different type of files. This duration is an optimized one though.
Although caching has benefits but it has a minor drawback as well. And that is the user won’t be able to view changes in the file soon if you change anything. I.e., they’ll keep viewing the same old file for some period of time.
Enable Keep Alive
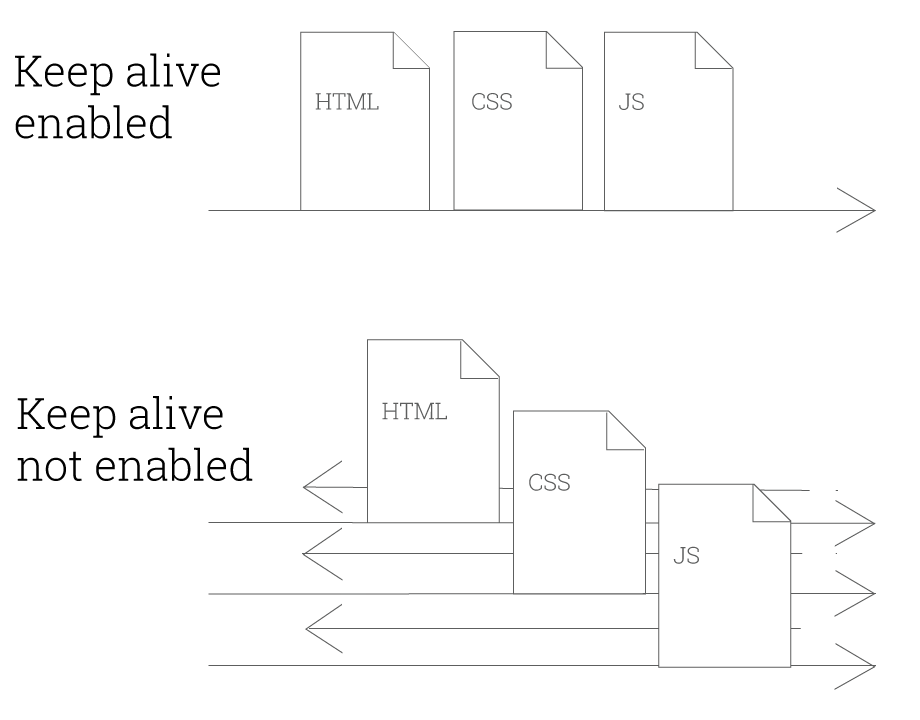
Keep alive is a method to allow the same TCP connection for HTTP conversation instead of opening a new connection with each new request.
More simply put, it is a communication system between the web server and the web browser that says “you can grab more than just one file at a time.” Keep alive is also known as a persistent connection.
Keep alive is enabled in HTTP connections by default but shared hostings may turn it off as they have to serve millions of pages from one hosting.
Generally, keep-alive is enabled using the “Connection: Keep-Alive” HTTP header. Keep Alive disabled means your HTTP headers are stating “Connection: close”. You should change that to “connection: keep-alive” to enable keep alive for your web page.
In addition to that, keep alive enabling also depends on the server you are using and what you have access to. Here are most common methods for enabling keep alive in different servers.
1) Enabling Keep Alive via .htaccess File
If you have access to the .htaccess file, you can add the following code in your file, and that’s it. It’ll enable keep alive for you in most of the cases.
<ifModule mod_headers.c> Header set Connection keep-alive </ifModule>
2) Enabling Keep Alive in Apache
If you are able to access your Apache config file, you can turn on keep-alive there. The applicable sections are shown below:
# KeepAlive: Whether or not to allow persistent connections (more than
 # one request per connection). Set to "Off" to deactivate.
 #
 KeepAlive On

 #
 # MaxKeepAliveRequests: The maximum number of requests to allow
 # during a persistent connection. Set to 0 to allow an unlimited amount.
 # We recommend you leave this number high, for maximum performance.
 #
 MaxKeepAliveRequests 100

 #
 # KeepAliveTimeout: Number of seconds to wait for the next request from the
 # same client on the same connection.
 #
 KeepAliveTimeout 100
3) Enabling Keep-Alive in NGINX
Keep alive issues can be tackled using the HttpCoreModule. There is a specific directive you should look out for… “keepalive_disable”. If you see this make sure you know why it is disabling keep-alive before removing.
4) Enabling Keep-Alive in LiteSpeed
Keep-alive is usually set on in LiteSpeed servers by default but your server maybe using “smart keep-alive”. This setting in LiteSpeed servers is used for high volume websites. Keep this setting on will show page speed tools that keep-alive is disabled.
“Smart keep alive” will request the initial file (the HTML file) with a connection close in the HTTP header. It will then request all the other files (CSS, js, images, etc.) with keep-alive enabled. This allows more users to be able to connect at once when there are many concurrent requests.
LiteSpeed server users should disable keep smart keep alive. As a result, they will be able to experience full keep alive. However, If you are a high volume website, you should not do so.
Keep alive is very useful if your website is resource-intensive, i.e., it is using a lot of CSS, JavaScript and image files. Enabling keep alive will result in a drastic change in website speed and your users will be able to enjoy high-speed web pages.
Minimize Redirects
A redirect is an instruction or method that automatically takes visitors of one location to another location or place. Redirects are not good for page speed as they keep taking visitors from one place to another.
Redirectors for people using mobile phones make their experience worse. Therefore, you should take care of all redirects on your site.
There are two types of redirects:
1) Server Side Redirects
These are fast, cachable redirects. Common server-side redirects are 301 and 302 redirects which use HTTP to inform that a page or resource has moved. 301 redirects are temporary while 302 are permanent ones.
These are server side redirects in which web server uses HTTP to direct the browser to the new location. The web browser can handle these types of redirect much quicker than client-side redirects and can cache the correct location of the file.
2) Client-Side Redirects
These are slow, not cachable redirects. Redirects that use the http-equiv=”refresh” attribute or javascript can introduce even longer waiting times and performance issues and should be not used if at all possible.
Here are some advice from Google regarding these redirects:
“Never link to a page that you know has a redirect on it. This happens when you have manually created a redirect, but never changed the text link in your HTML to point to the new resource location.”
“Never require more than one redirect to get to any of your resources.”
And this is how you remove redirects:
- Find all redirects using some online tool.
- Understand why this redirect is there.
- Check to see how it is affected/or affects other redirects.
- Remove if required/possible.
- Update your system if it affects/is affected by other redirects.
Although redirects are problematic and result in page delay, you should be very careful while removing them. If you are confident that you’ll remove all redirects with creating broken links, go ahead and do this otherwise ask some expert to do this for you.
Optimize Critical Rendering Path

The rendering path is a sequence of events which happen when a page is displayed on a web browser. For example, Get HTML > Get resources > Parse > Display webpage is a rendering path. Optimization of this sequence of the event can result in significant increase in page speed.
Whenever browser calls a page for displaying it, it first downloads HTML file, parses it, understand it and locate other resources like images, CSS and JavaScript files. After reading HTML file, it starts downloading other resources and never shows anything to the user unless it downloads all CSS code. Therefore, it is very important to call resources in this sequence.
HTML > CSS > JavaScript (for above the fold only, remaining can be called later) > Images > Audio > Video
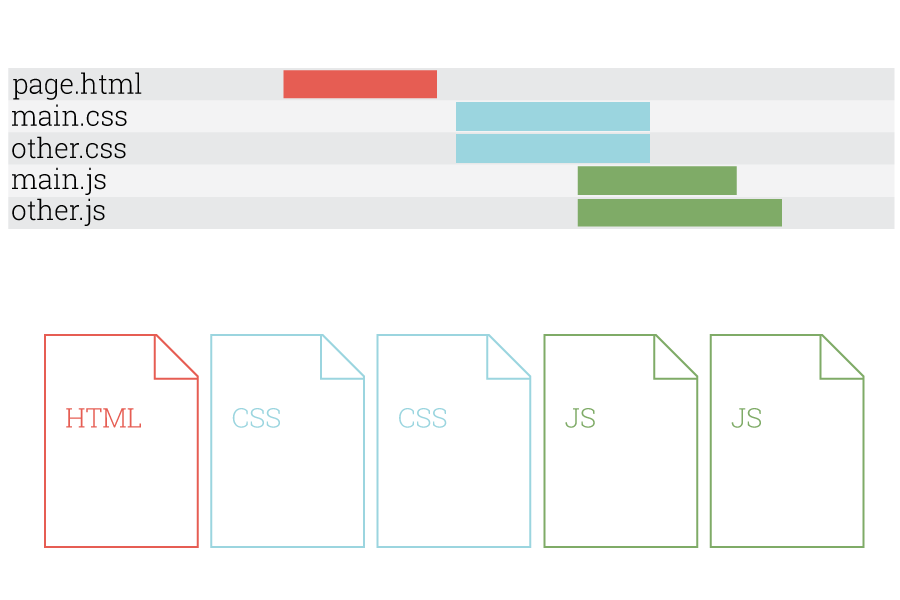
This is the optimized way to call your resources and doing so will result in a fast speed of your web pages. Also, you should make sure that you are following all advices related to the JavaScript and CSS given above.
Conclusion
PageSpeed is very important for ranking yourself high in the Google and giving your users an amazing and fast experience. It depends on many factors and even one factor among all can reduce your page speed significantly. Here are the key points which should be considered for enhanced page speed.
- Eliminate render-blocking CSS, minify it and always call CSS first.
- Eliminate render-blocking JavaScript, combine all JavaScript to make one file and try to use inline JavaScript. Do Not forget to call JavaScript on the right place.
- Get a right web hosting plan and reduce server response time by considering above tips.
- Enable G-Zip compression on all your files. This will reduce the size of your resource files and increase speed.
- Enable keepalive. This has a significant impact on page speed.
- Minimize redirects and ask the developer beforehand to keep as fewer redirects as possible.
- Optimize your rendering path so your page will load many times faster.
Following these all tips will result in many times faster pages and you’ll be able to get more traffic on your website. Your feedback is always welcome.
Let me know what you think about this guide in the comments section. I’ll be glad to hear from you in this regard.